Alright, you’ve done it! You’ve tracked down or created the perfect pictures to go up on your website. Before you take that gorgeous masterpiece and put it on your website, you should know that optimizing your images for the web can have a huge impact on your site’s performance.
Finding the right balance between reducing file size and not losing quality can be tricky. Image optimization is most successful when you keep your images looking great while keeping page load times short for users (and Google). After years of struggle trying to find that balance between performance and style, I’ve come across a couple of insider tips on how to keep your images high quality and keep your site performing at its best.
Benefits of Image Optimization
It may seem like a bunch of trouble but the benefits of image optimization easily outweigh the bit of extra time spent. Ensuring that all of your images are ready for the web can have real benefits for you and your users. In comparison to other components that make up a webpage such as javascript or CSS files, images can take an average of 22% of pages overall data.
While faster load times are a big draw of using smaller files this can have a waterfall effect. Keeping the payload of your webpages down will keep you from racking up charges on users’ mobile data plans. Image optimization also leads to improved SEO rankings, faster site backups, and reduced storage and bandwidth usage.
Getting Started
To begin on our path of image optimization we’ll need a couple of things.
First, we’ll need an image to optimize. Luckily, our resident Videographer, William, has provided us with one of his favorites in all of its 4k glory.
Here is a preview of the image we’ll be optimizing: a massive 4k image of the harbor in Portsmouth, NH.

Thanks, Will!
You can download the image here to follow along and try out these tricks for yourself.
Note the 10mb size we are starting with, we’re going to improve this dramatically.
Second, you’ll need a program that can resize and help you optimize images. I’ll be using Adobe Photoshop in this tutorial but at the end of the article, there will be a list of alternative tools if Photoshop isn’t your jam.
Image Size and File Type
There are two big facets to pay attention to that can make a big difference in the file size of your images quickly. Sizing images to the size of the container they are going to fill and making sure you are switching between file types appropriately.
Size for the Container You’re Going to Fill
The fastest way to reduce your file size is to make sure that your images are sized for the container they are going to fill. This means a little bit of planning ahead. Most 4k images come in massive sizes that most monitors wouldn’t be able to display anyway.
Most monitors in use today are using resolutions far below the 4k monitors available. And with so much use on mobile devices nowadays you’re rarely going to be critiqued on not having 4k images. So unless you are specifically worried about catering to the 4k monitor crowd you likely won’t ever need to go over 2048px in width even for full-screen images.
Breaking Down the Sizes
That being said, taking a look at our original image we are starting from a point of 5472px x 3648px. Far and above the 2048px we need. William’s image is certainly ready for print but its unnecessarily large to be served up over the web as it is.
To change the size of an image in photoshop, simply click Image > Image size and edit the width/height down to the size of the container you plan to fill cropping if necessary.
If we take the image and reduce it to a max-width 2048px we see a dramatic drop in file size from ~10MB all the way down to 3.23MB (~67%).
That’s still pretty big for a full-sized image but we’re heading in the right direction! Let’s resize again for this blog post ~780px wide.
Resizing for the container it’s going to take (this blog post) gets the image size all the way down to 526kb. Now we are really getting somewhere! This is before we do any further compression and we’re already starting to get into a more acceptable range of image size.
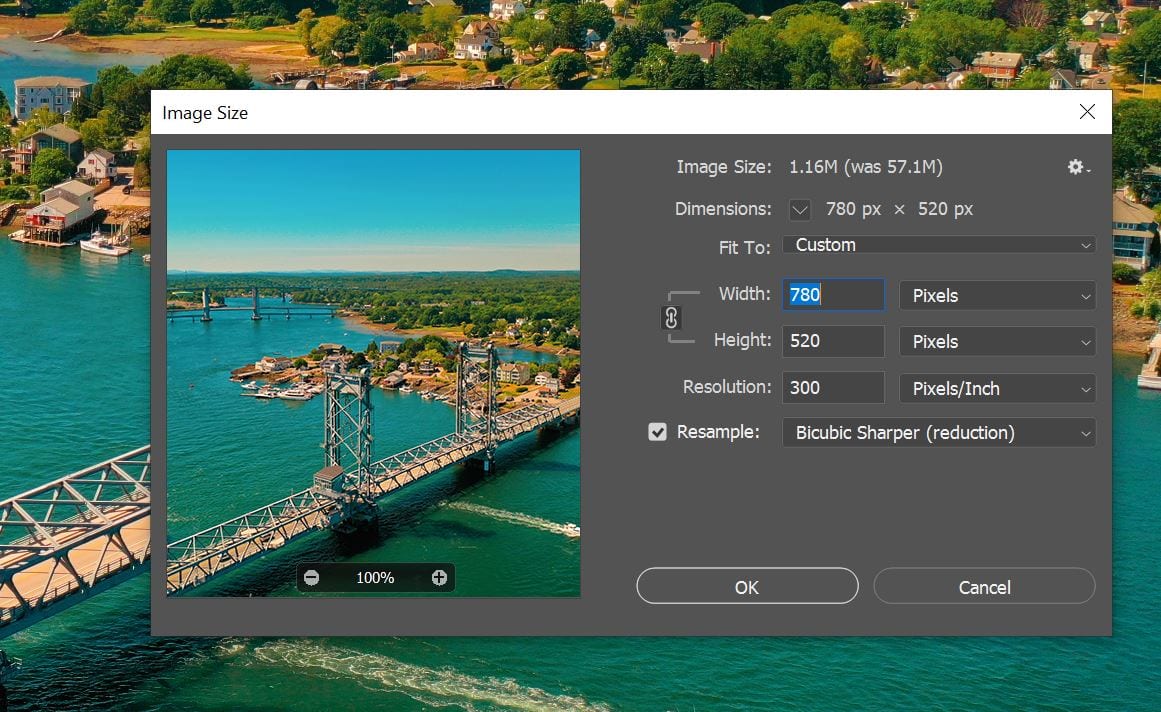
In Photoshop go to Image > Image Size to alter the Width and Height.
File Type Matters
There are several different types of files out there that can be used for images but in general, there are three commonly used file types…
- JPG – A lossy compressed file format. This makes it useful for storing photographs at smaller sizes and is great for photographs and realistic images that don’t need any transparency.
- PNG – A lossless compression file format. PNG’s support transparency, making them great for logos, icons, or large scale images that need a transparency layer.
- GIF – Limited to only 256 colors these are best for small icons/logos. In general, these are hard to use correctly and can be avoided unless you really want to fuss over every kb.
The best rule I follow is to use .jpgs for photographs and images that don’t need a transparency layer. While .png’s are for images that need a transparency layer, such as logos.
Bonus: There’s another upcoming file format that will eventually outpace both JPG and PNG called WEBP but until Safari gets on its game it’s not fully usable across all modern browsers.
Debunking a Myth: Web Images Need to be 72ppi
There is an old argument that 72PPI (Pixels Per Inch) is the best for web. There’s no denying how much of a difference changing the resolution can make to a files overall size. But these savings are null in comparison to making sure your images are resized to fit the container they are going to be filling.
High-resolution images are often prepared for print at anywhere from 300 to 150 PPI. This is great for print as it gives printers plenty of data to work with when putting images to paper/canvas.
In the end, a 72 PPI image and a 300 PPI image will appear the same on your screen. The pixel dimensions (width & height) in combination with an image resolution is what dictates the overall file size.
To prove this point take a look at the two images below. Different resolutions but the same file size and dimensions make them identical to the human eye.
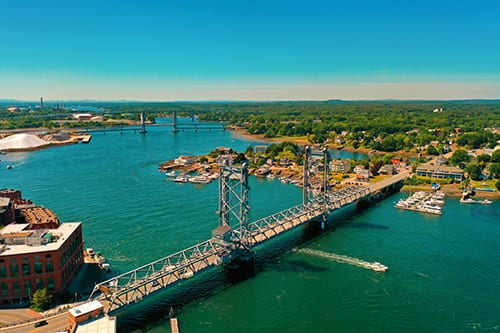
Portsmouth Harbor @ 72PPI ~ 233KB

Portsmouth Harbor @ 300PPI ~ 233KB
Further Optimization and Tools
We can further optimize our images by playing with the image quality or using additional tools. I like to use about 80% quality for exports since its a nice balance between quality and file size.
Below is a quick comparison of what happens if you go too far with quality.
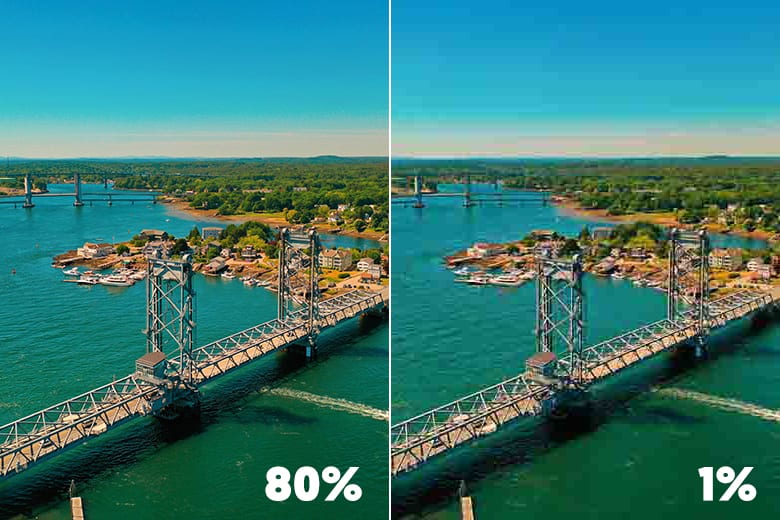
Keeping images to about 80% quality will keep the visual clarity they need and help reduce the file size further.
To pull this off in photoshop simply export and modify the quality before you click save. There is no perfect number to use for quality so it’s going to take some guessing and checking luckily. Photoshop will show you a preview of what you are exporting so you can check it for quality.

Changing an images quality in photoshop before export.
Additional Tools
Online Image Compression Tools
- Imagecompressor.com – Free online image compressor that I use frequently on client sites in a pinch. One of my favorite online tools available.
- Tinypng.com – Similar tool that allows for bulk uploads and a premium version.
WordPress Plugins
- Smush – With a free and premium version this is one of my favorite plugins for WordPress for automated image compression.
Alternatives to Photoshop
- Gimp – Free cross-platform image editor for those on a budget.
- Affinity Photo – If you aren’t about Adobes Subscription model, Affinity has a lot of the same tools for a one-time price.
Next Steps
If you’re not already optimizing your images for the web then there’s no time like the present. Optimizing images for your site before you upload is easy to add into your normal workflow. Plus, as a result, your website’s performance will radically improve and your users (and Google) will thank you for it.
The next steps would be to introduce an efficient caching policy and using a CDN to serve images from another server. Luckily, we offer Web Hosting that uses top of the line caching and image optimization tools to help sites perform at their peak. Additionally, if you’re looking to get your hands on your own 4k drone footage, we can help with that, too!